A multi-level list is also known as a multi-level outline because it resembles an outline. In a multi-level list, a list item contains one or more lists, thereby creating hierarchical relationships between them. A multi-level list can be as deep as nine levels.
Defined list and paragraph style are the building blocks of multi-level list. We combine both of these concepts to build a multi-level list. Follow these steps to create a multi-level list in InDesign:
- Create a defined list. Read this article to learn what it is and how to create a defined list. This is the only list that you use in all paragraph styles.
- Create paragraph style for each list level or outline and assign the defined list created in the first step. For example, you will need nine paragraph styles for a multi-level list of nine levels, and you will assign the same defined list to each of these nine paragraph styles. You can read how to create paragraph style for running lists and InDesign’s official user guides here for more information about paragraph style.
- Customize the settings available for level, numbering format, alignment, indent, tab position, and others. If you read this article on bulleted or numbered lists, you will have a full understanding of how to customize Bullets and Numbering Section on Paragraph Style Options panel.
- Finally, use paragraph styles to format paragraphs to a multi-level list.
Creating a Multi-level list of Level 3
Suppose that we create a multi-level list of three levels. As a result, we need to define three paragraph styles for each level. As a practical course of action, let’s create them one by one following the steps outlined in point 2 above. In addition, you must create a defined list per the step mentioned in point 1. The ultimate result will be the right-hand side of the following image:
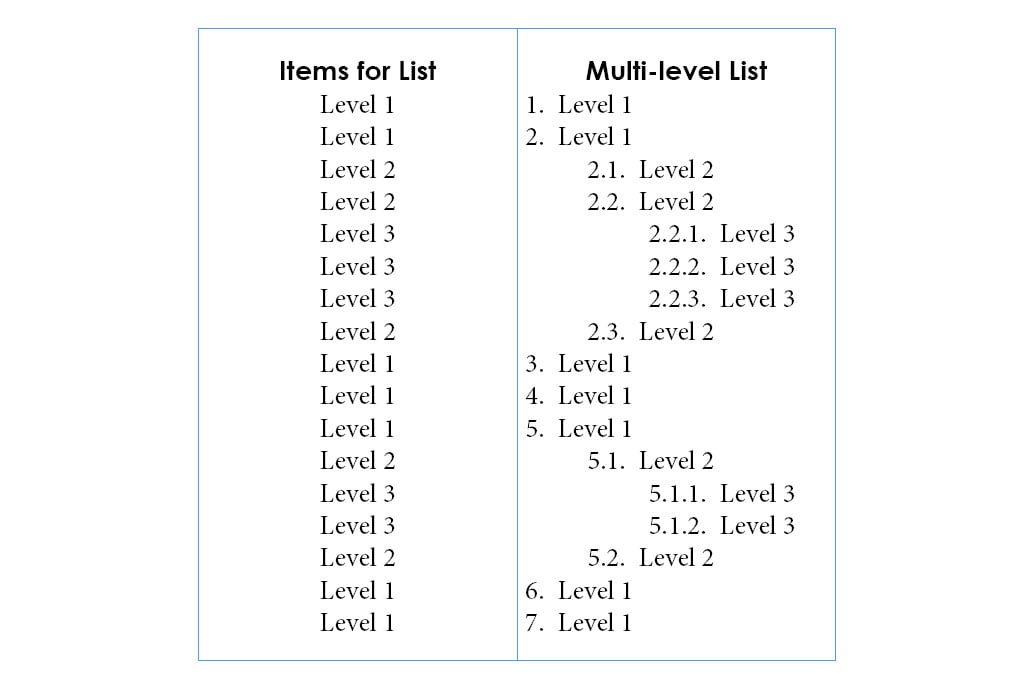
The left-hand side of the above image presents an initial list of items before applying multi-level, and the right-hand side of the image is the multi-level list we are going to create.
First Paragraph Style for Level 1
- Create a new paragraph style by going to Window > Styles > Paragraph Styles > Paragraph Styles panel menu > New Paragraph Style and give it a name – Paragraph Style Level 1.
- Choose Basic Paragraph or No Paragraph Style on the Based On field.
- Choose Bullets and Numbering on the left-hand panel menu.
- Select List Type as Numbers.
- Choose the name of defined list (same for all levels of paragraph styles) as a value of List field.
- Place Level value as 1.
- In the Bullet or Number Position section, align to the right, set the left indent and first line indent to 0p6, and set the tab position to 2p2, for example.
- Click ok.
Second Paragraph Style for Level 2
- Create a second paragraph style and give a name – Paragraph Style Level 2.
- Choose Based On field value as Paragraph Style Level 1.
- Choose Bullets and Numbering on left-hand panel menu.
- Select List Type as Numbers.
- On List field, choose the same name of defined list as in the first paragraph style.
- Set Level value equal to 2 this time.
- In the Number field, place cursor at the beginning of box and choose Insert Number Placeholder > Level 1. This will insert numbering of level 1. Finally, insert period (.) in between to separate the numbers.
- Check Restart Numbers at This Level After to start new numbering at each new level of 2.
- In Bullet or Number Position section, align to right, set left indent and first line indent to 2p0, and tab position to 4p6.
- Click ok.
Third Paragraph Style for Level 3
- Create third paragraph style and give a name – Paragraph Style Level 3.
- Choose Based On field value as Paragraph Style Level 2.
- Choose Bullets and Numbering on left-hand panel menu.
- Select List Type as Numbers.
- On List field, choose the same name of defined list as in the second paragraph style.
- Set Level value equal to 3.
- In the Number field, if any ^1 metacharacter is at the start of box, then delete it, otherwise place cursor at the beginning of box and choose Insert Number Placeholder > Level 1 and insert period (.) immediately after. Again, go to Number Placeholder > Level 2 and insert period (.) immediately after. As you know, this will insert the numbers for levels 1 and 2. Note that the inserted periods(.) are for separations of numbers from different levels.
- Check Restart Numbers at This Level After to start new numbering at each new level of 3.
- In the Bullet or Number Position section, align to the right, set the left indent and the first line indent to 3p6, and the tab position to 7p6.
- Click ok.
After all, you are ready to apply paragraph styles for different list levels. Select the list items to be formatted into multi-levels and click paragraph styles to apply them.
Congrats! You are successful in creating a multi-level list in InDesign.